Use your Sketchfab models in BelowJS
Built for underwater photogrammetry
BelowJS provides optimised rendering and performance specifically designed for underwater photogrammetry models in VR.
Before you start
Many underwater photogrammetrists already use Sketchfab to share their work. A scaled and oriented model from Sketchfab can be loaded into BelowJS in minutes - they work well together. This guide will show you how to create your own viewer with better performance, customisation, and full control over the experience.
You'll need:
- A Sketchfab account with models that have downloads enabled
- Basic HTML knowledge for editing file paths
- 10 minutes to follow this guide
Step 1: Orient your model
Sketchfab models look best when they are properly oriented. If you already rotate your models so they have a proper floor, you're all set. If not, this can be done in the 3D Settings page under General → Straighten Model, then check Show Advanced Rotation. Additionally, this orientation will improve display quality on Sketchfab as well.
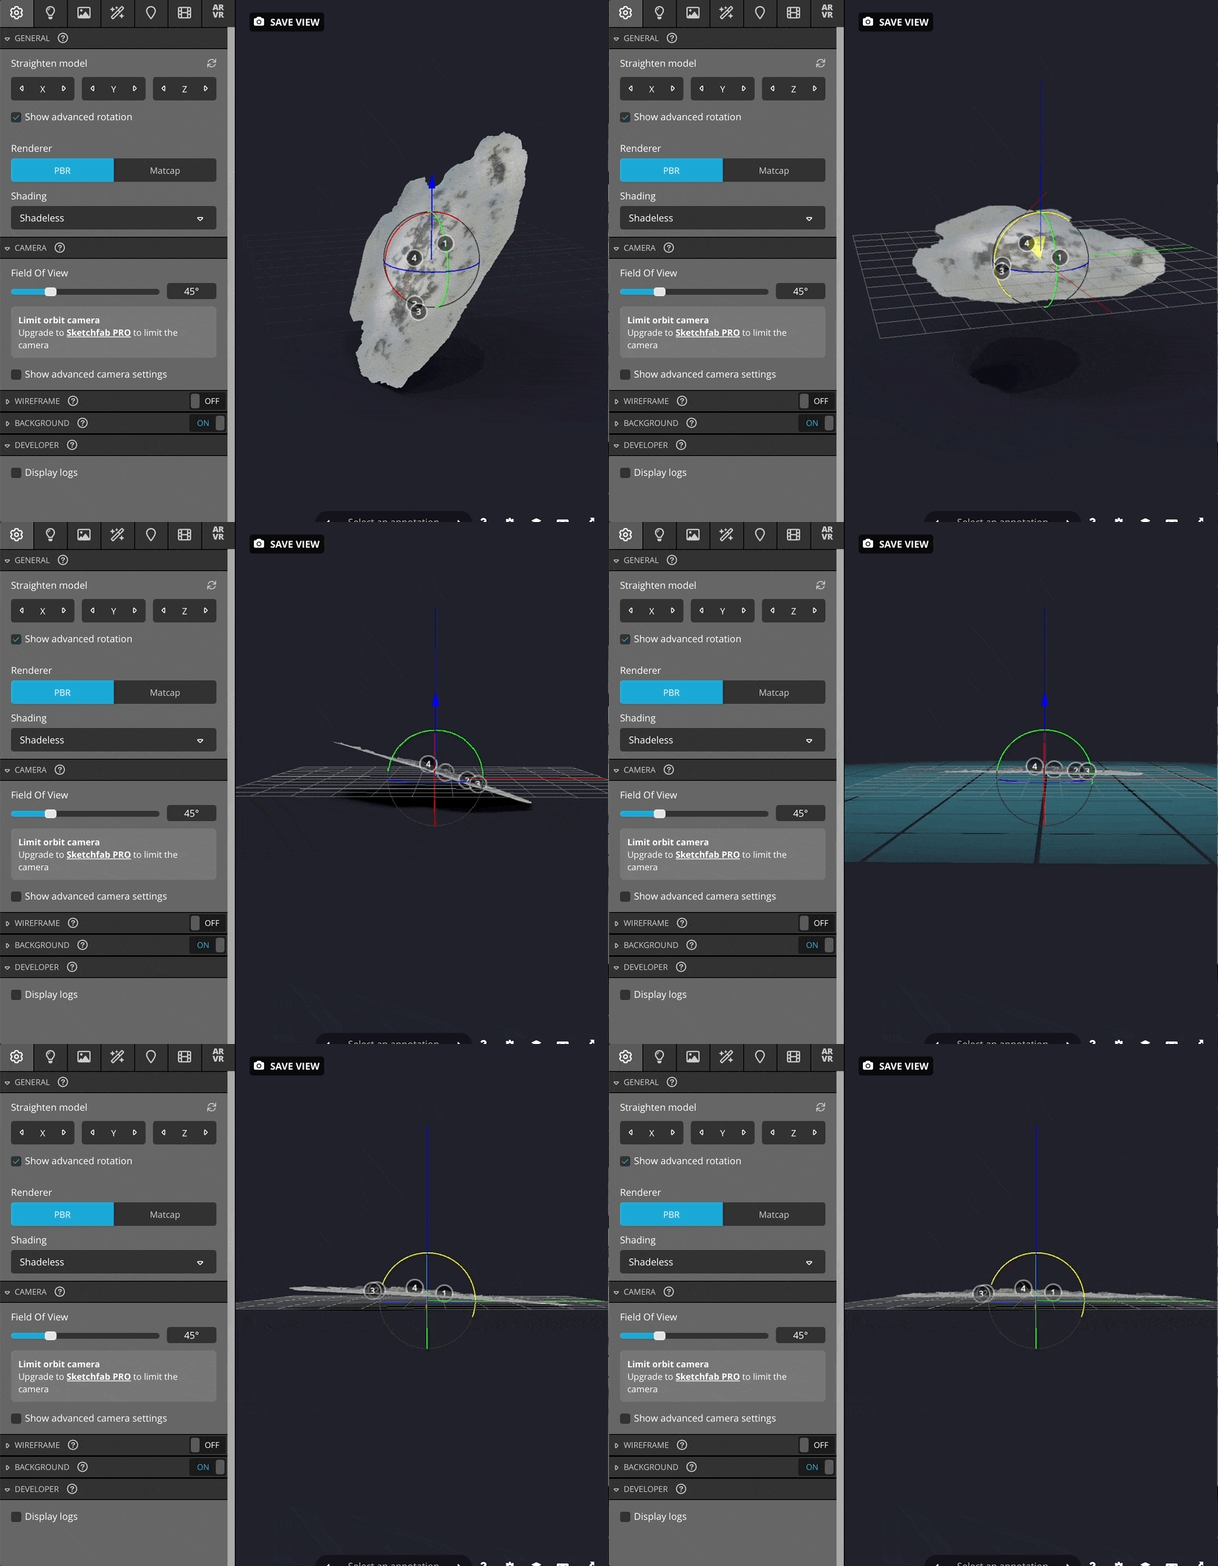
Orient your model
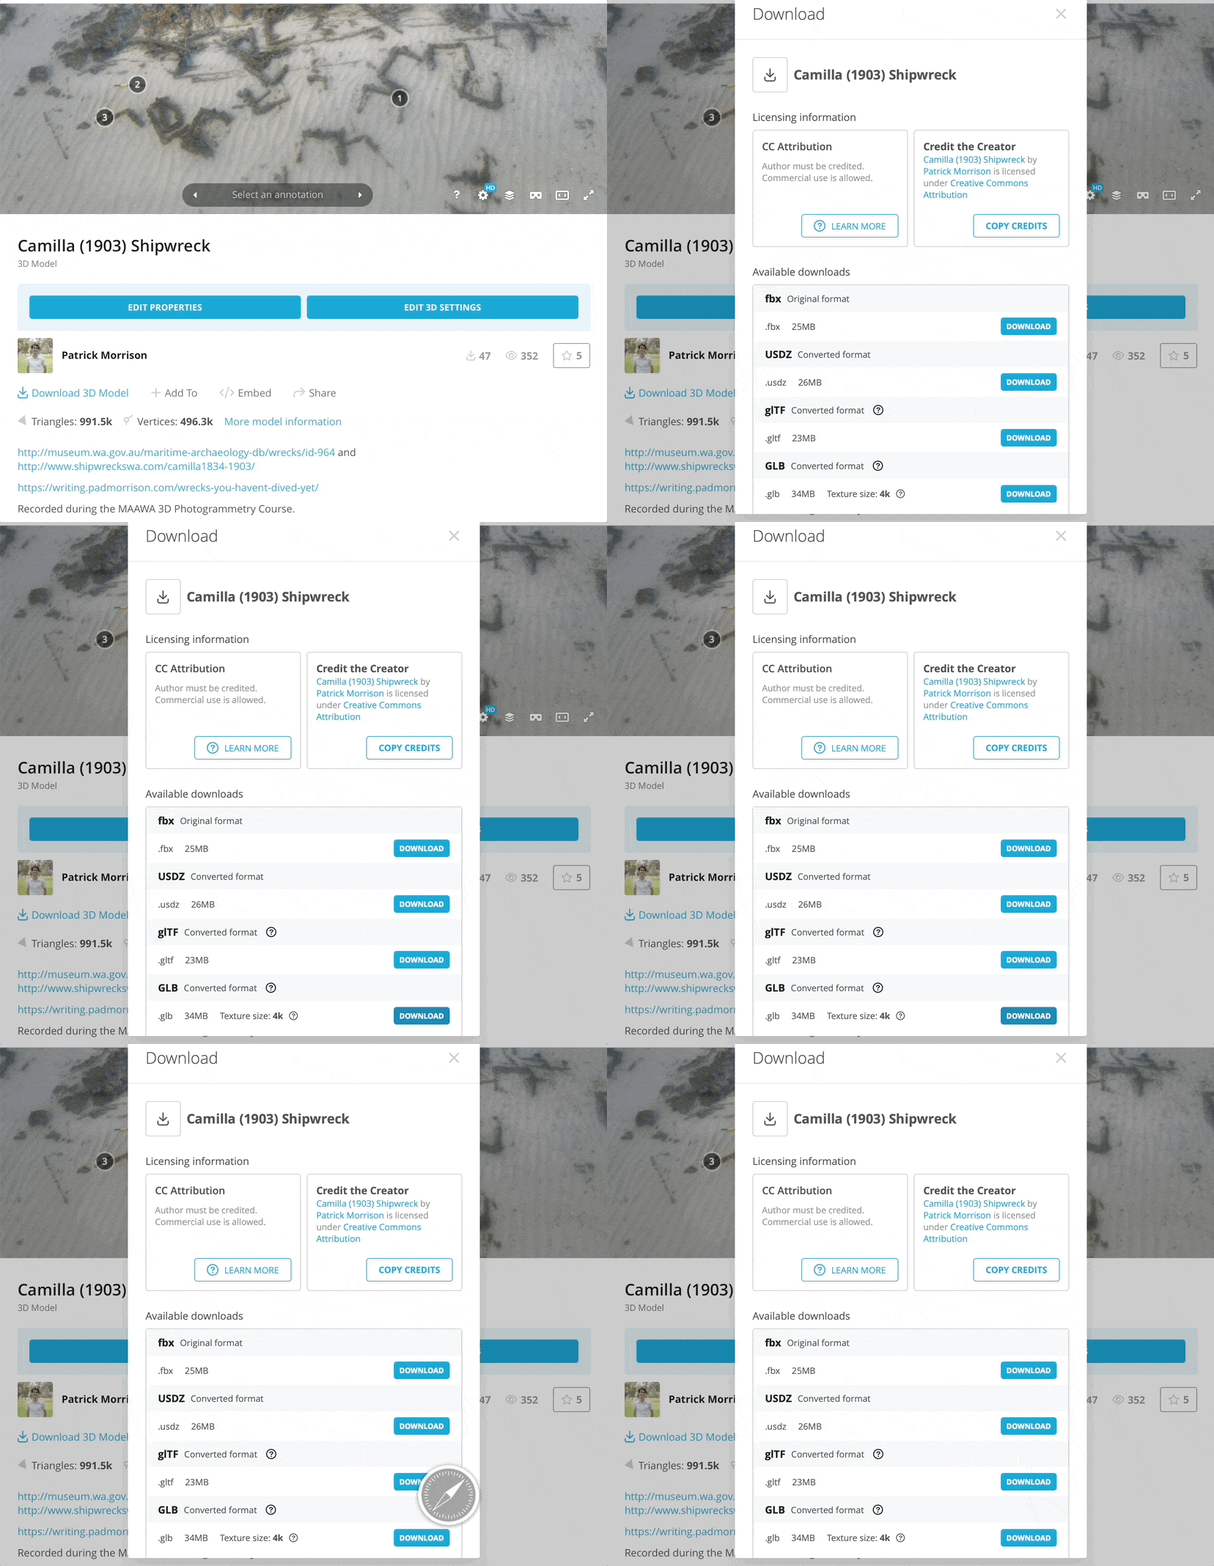
Download as GLB
Step 2: Download as GLB
If your model has downloads enabled, you will find it below the viewer on Sketchfab. If not, you may have the option in Model Properties to download the model as GLB, or you may need to adjust download permissions in your model settings. You can download in any format and convert to GLB, but this saves an extra step.
Step 3: Test in Drag and Drop viewer
Your model will load immediately and you can check if everything works properly!
Test your model and check file size, polygon count, and performance.
Test your model →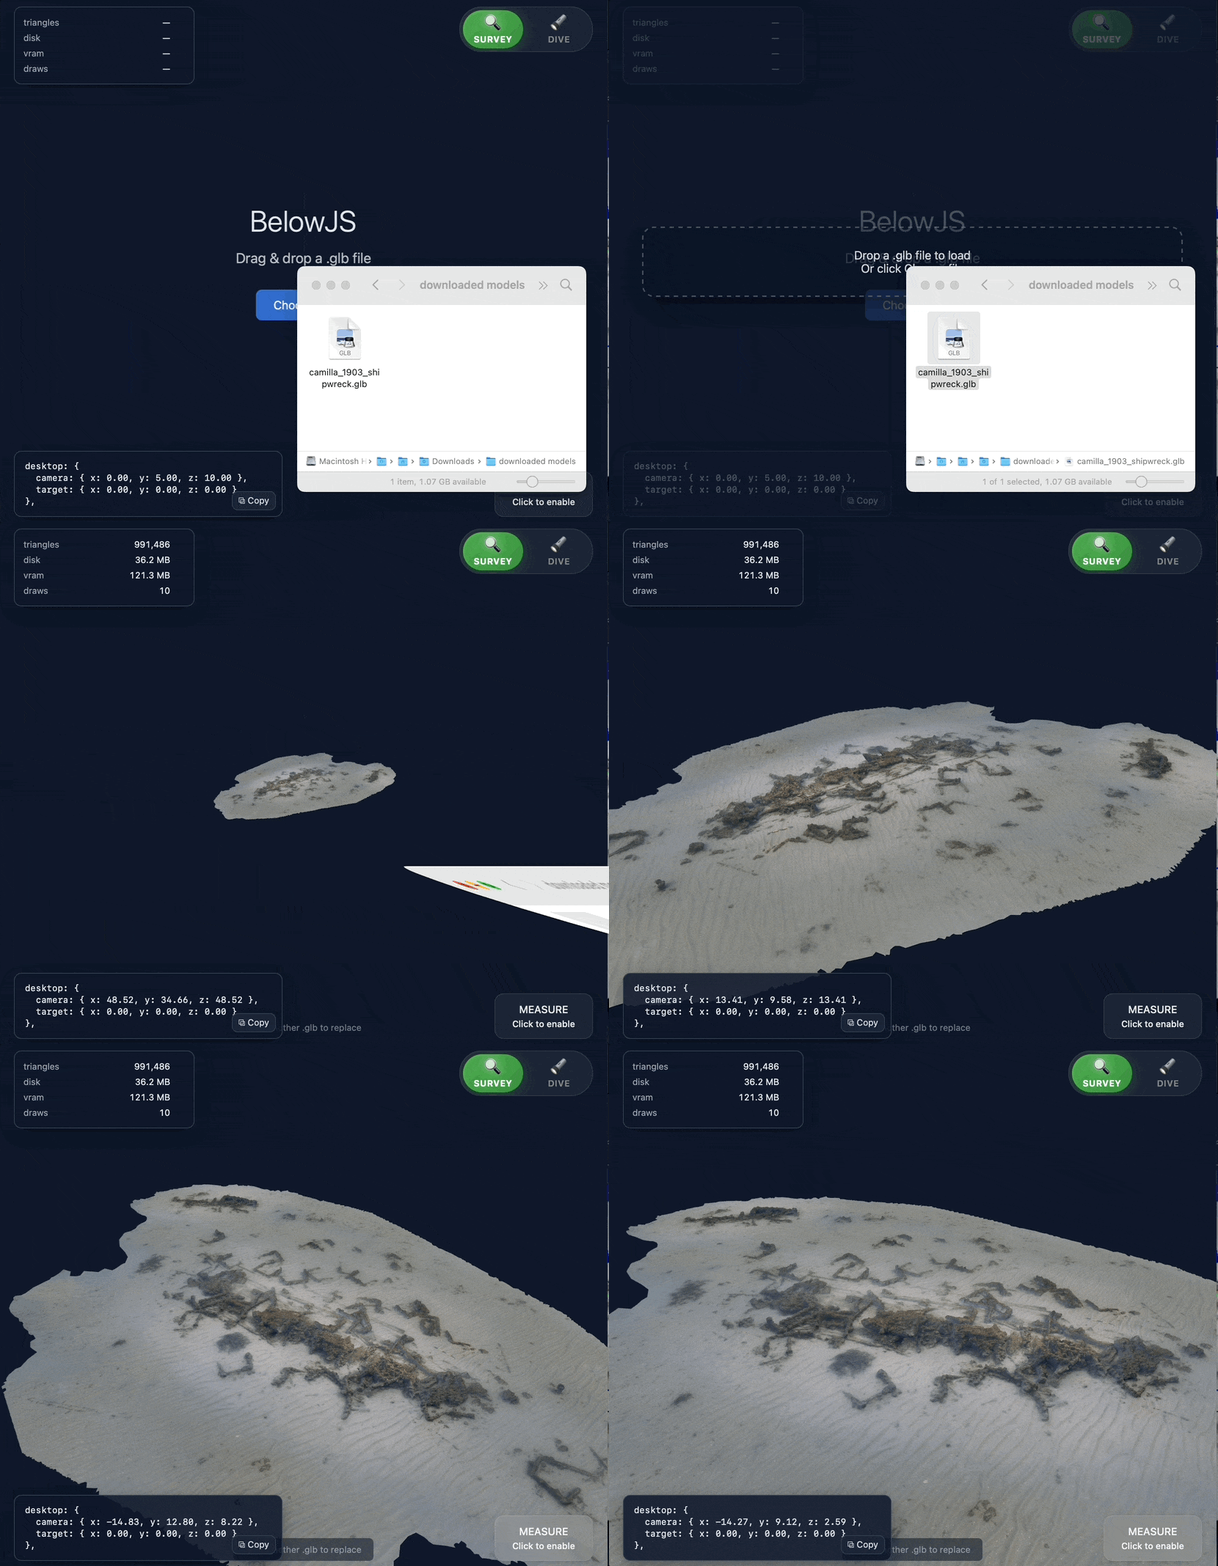
Test in drag and drop viewer
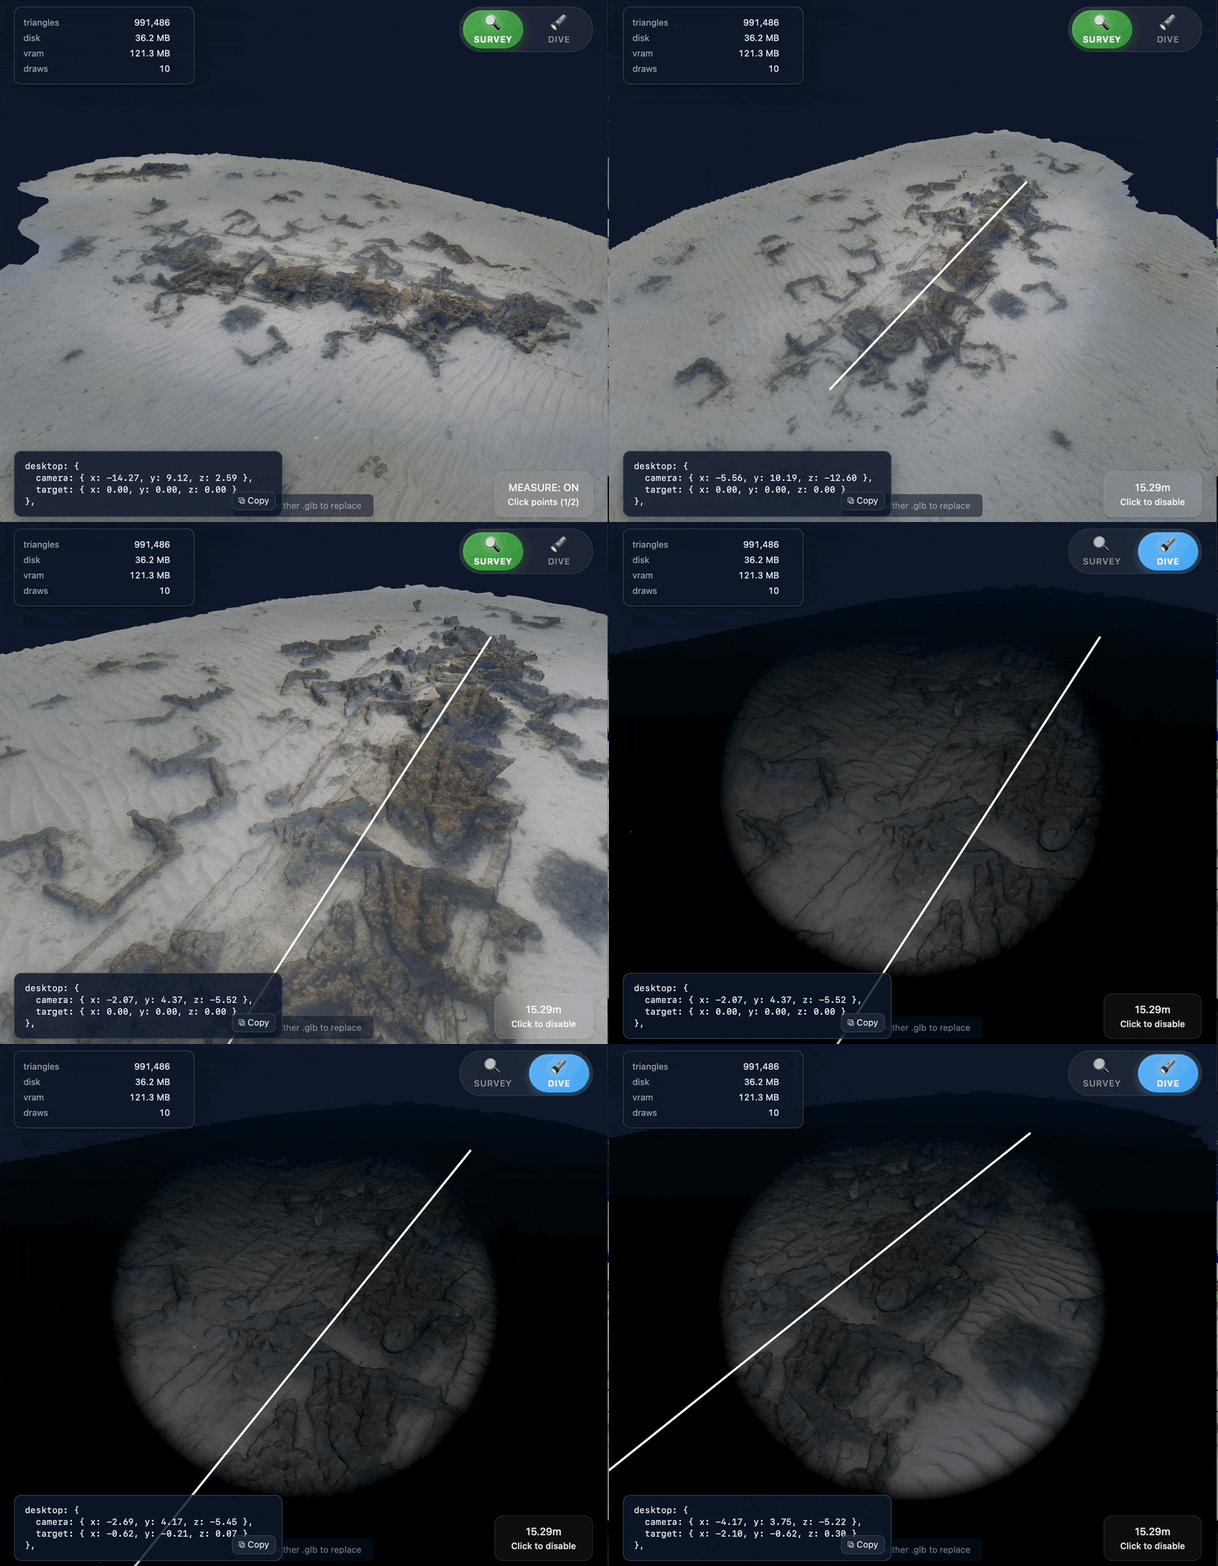
Measurement and dive mode
Step 4: Optimise and scale your model (Optional)
If your model wasn't scaled before you uploaded, follow the model setup guide. The Blender process is probably the easiest.
Sketchfab GLBs are already well optimised, but we can do better - especially for VR. Use the optimisation guide. With the script, it's as simple as running:
./below-optimiser pack input.glbStep 5: Copy the Basic example
The basic example uses CDN imports, so nothing else is needed - just the HTML file and your models!
- Download the basic example HTML
- Put your own models in the same folder
- Edit the HTML to change the file paths
- Use the drag and drop viewer to choose initial camera positions for your models
Your folder structure will look like this:
belowjs-example/
├── index.html          # Basic example HTML (uses CDNs)
└── models/
    ├── camilla_1903_shipwreck.glb
    └── another_wreck.glb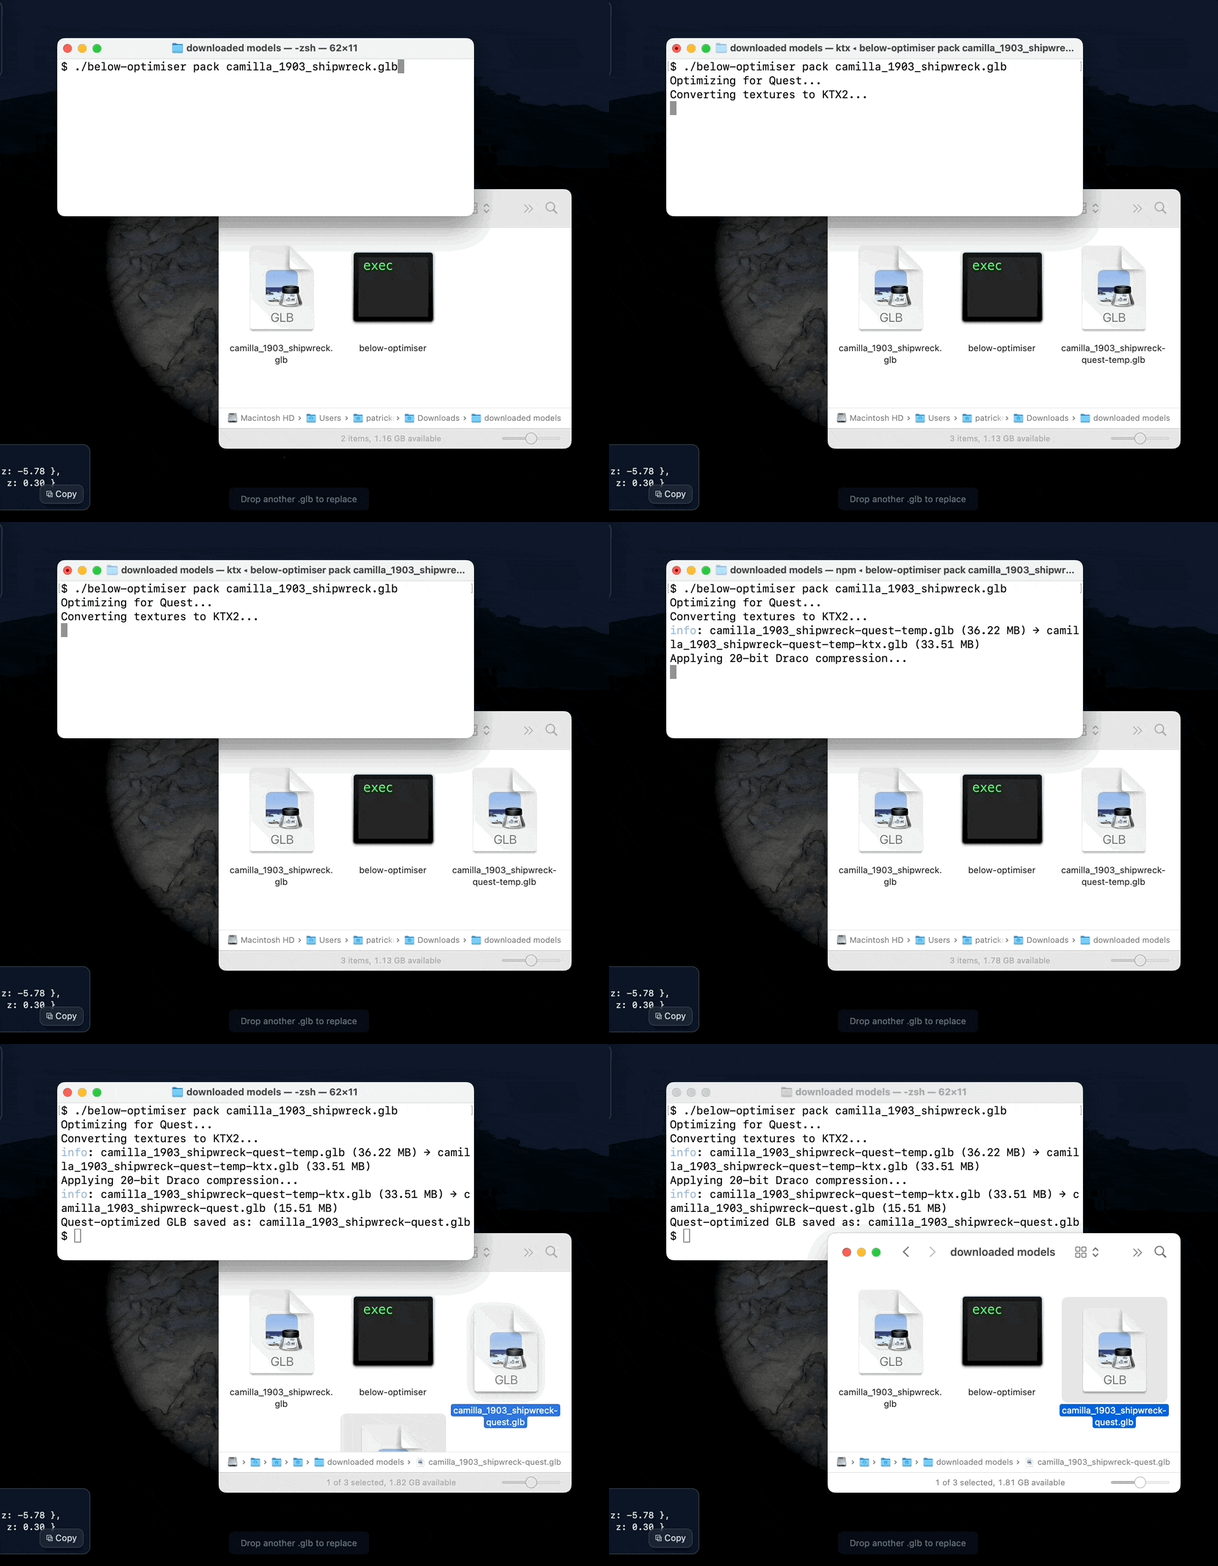
(Optional) Optimise your models
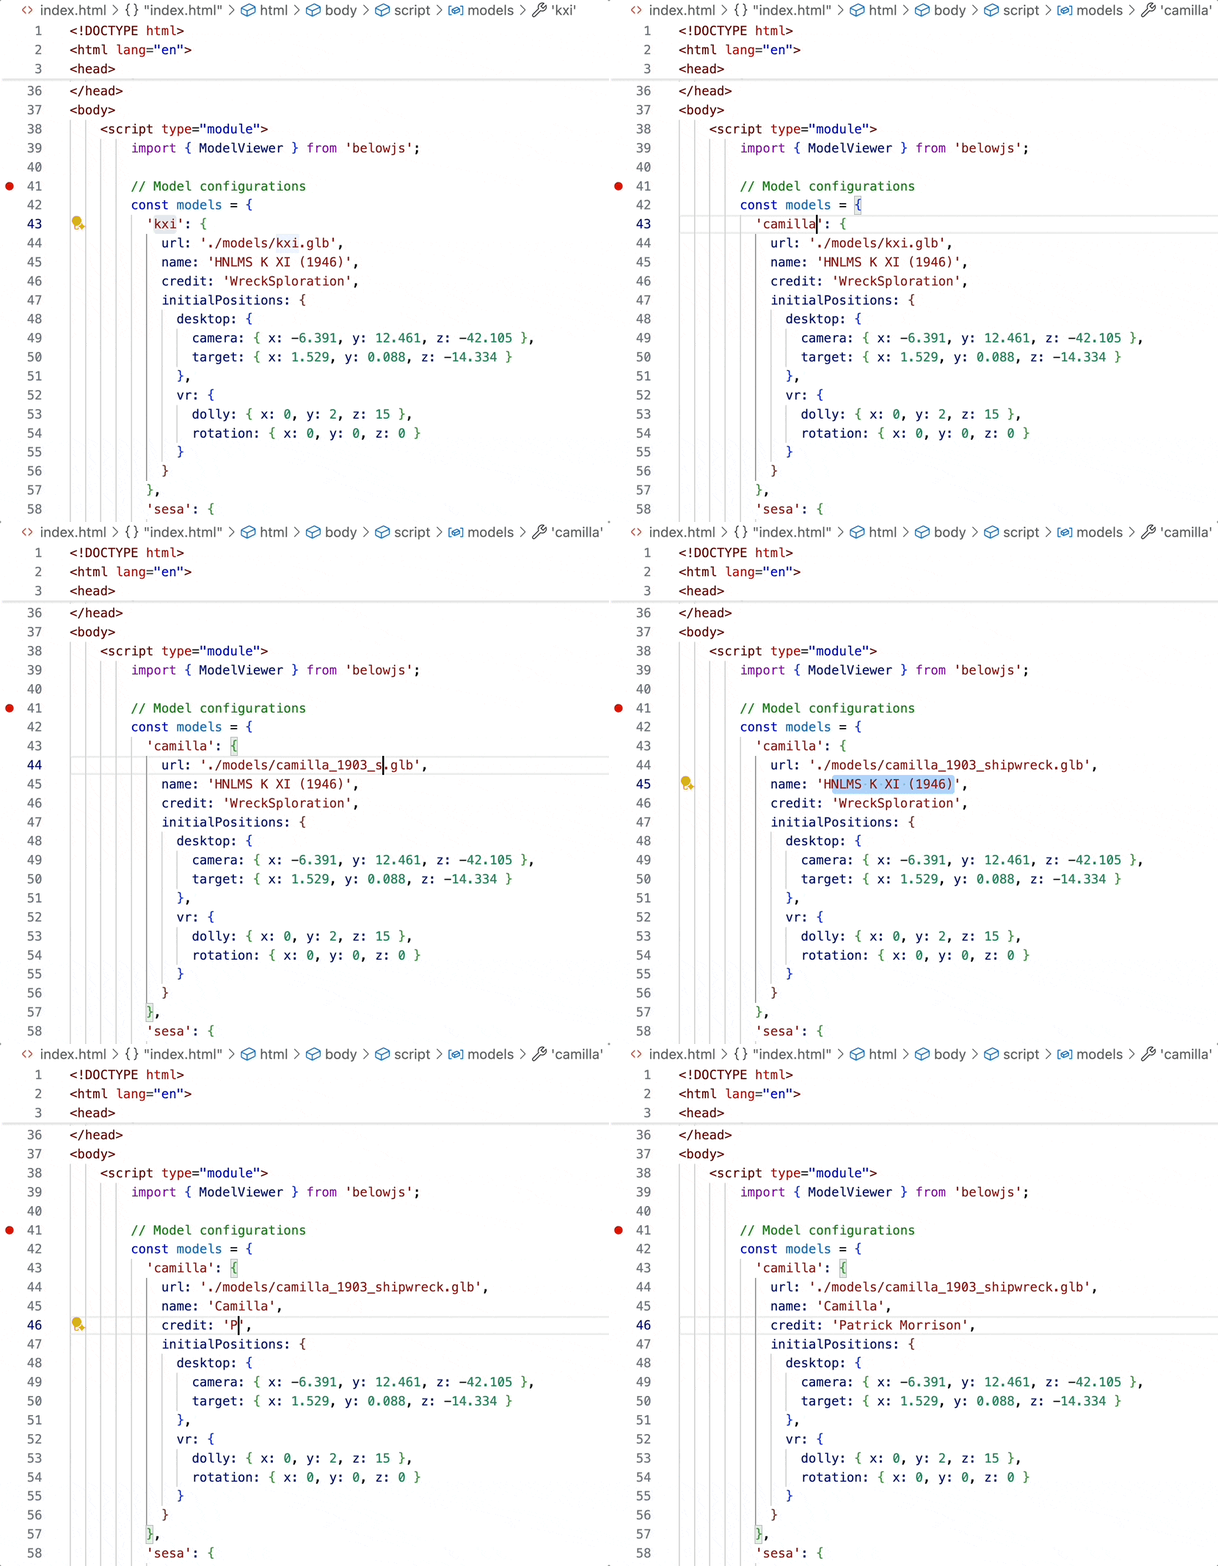
Edit a few lines of HTML
Step 6: Upload to the internet
You can use any static hosting — GitHub Pages is free, or services like Netlify offer free tiers. For the fastest path, drag-and-drop your folder onto Netlify Drop. Paid hosting starts from a few dollars a month, and you have full control.
Additionally, check the examples page for an embedded viewer that can integrate as an iframe into your existing site, on any platform including WordPress.
Next steps
- Explore examples for advanced features
- Set up VR viewing for immersive experience
- Optimise performance for better loading
- See real implementations for inspiration